Welcome to the Canon Rebel T3 instruction manual, your comprehensive guide to mastering this versatile DSLR camera. This manual covers essential features, setup, and advanced techniques to help you capture stunning images and videos effortlessly. Whether you’re a beginner or an experienced photographer, this guide will walk you through every aspect of the Canon Rebel T3, ensuring you unlock its full potential.
Overview of the Canon Rebel T3 DSLR Camera
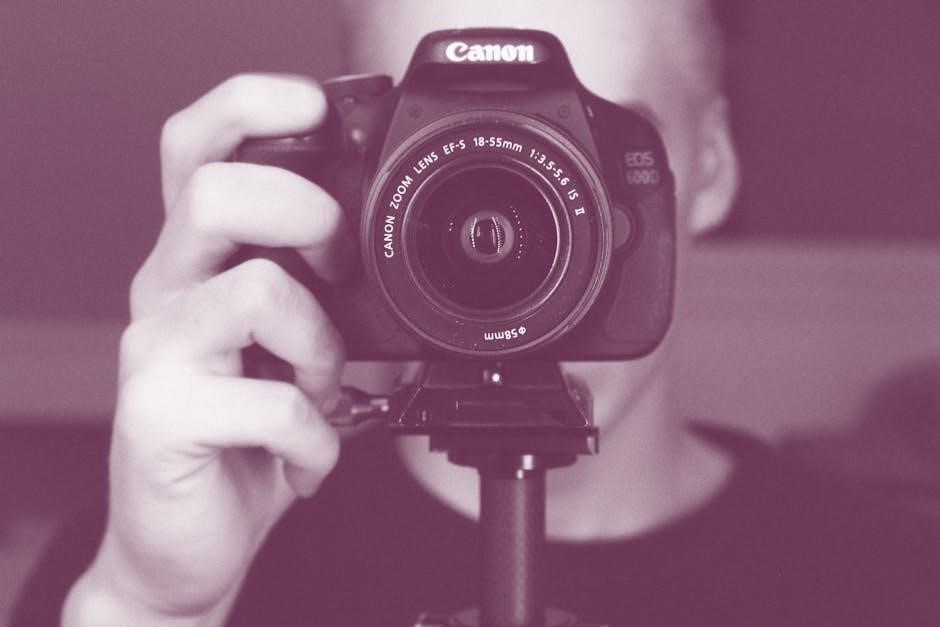
The Canon Rebel T3 is an entry-level DSLR camera designed for beginners and hobbyists. Featuring a 12.2 MP CMOS sensor and DIGIC 4 Image Processor, it delivers crisp images and quick response. Weighing under 500g, it’s lightweight and compact, making it easy to carry. Available in three colors, the camera offers essential features like a 9-point autofocus system and HD movie recording. A great starting point for photography enthusiasts, the Rebel T3 balances simplicity with powerful functionality, perfect for capturing life’s moments with ease and creativity.
Importance of Reading the Instruction Manual
Reading the Canon Rebel T3 instruction manual is essential for maximizing your camera’s potential. It provides detailed explanations of features, modes, and settings, helping you understand how to use the camera effectively. The manual also includes troubleshooting tips and customization options, ensuring you can resolve issues and tailor the camera to your needs. By familiarizing yourself with the manual, you’ll enhance your photography skills and make the most of your Rebel T3’s capabilities.
Basic Components of the Canon Rebel T3
The Canon Rebel T3 features essential components designed for intuitive operation. The mode dial allows quick access to shooting modes, while the viewfinder and LCD screen provide clear previews and playback. The menu button and navigational controls simplify settings adjustments. The memory card slot and battery compartment are conveniently located for easy access. The lens mount supports Canon EF-S lenses, enabling versatile photography options. Familiarizing yourself with these components ensures seamless camera operation.

Key Features of the Canon Rebel T3
The Canon Rebel T3 offers a 12.2MP CMOS sensor, DIGIC 4 processor, 9-point AF, HD video, and a 2.7-inch LCD for enhanced photography and videography.
12.2 Megapixel CMOS Sensor
The Canon Rebel T3 features a 12.2-megapixel APS-C CMOS sensor, delivering crisp, detailed images with excellent color accuracy. This sensor works seamlessly with the DIGIC 4 Image Processor to ensure low-noise performance, even in low-light conditions. It also supports a wide range of ISO settings, allowing for flexibility in various shooting environments. The CMOS technology enables efficient light capture, resulting in richer tones and improved dynamic range. This sensor is ideal for capturing high-quality stills and HD video, making it a versatile tool for photographers of all skill levels.
DIGIC 4 Image Processor
The DIGIC 4 Image Processor enhances image quality and processing speed for the Canon Rebel T3. It ensures faster operation, improved noise reduction, and better color accuracy. This processor supports the camera’s HD video recording capabilities and works in tandem with the CMOS sensor for optimal performance. It also enables efficient power consumption, extending battery life. The DIGIC 4 contributes to the camera’s responsiveness, making it a reliable tool for capturing sharp, vibrant images and smooth video footage, ideal for photographers of all levels.
9-Point Autofocus System
The Canon Rebel T3 features a 9-Point Autofocus System, designed for precise and rapid focus acquisition. This system uses nine AF points arranged in a diamond pattern, ensuring accurate subject tracking. It excels in various lighting conditions and supports AI Servo AF for moving subjects. The central cross-type point provides enhanced accuracy, while the surrounding points help maintain focus on off-center subjects. This system enhances overall shooting performance, making it ideal for capturing sharp images in diverse situations, from portraits to dynamic scenes.
HD Movie Recording Capabilities
The Canon Rebel T3 allows for HD movie recording, capturing video at 720p resolution with a frame rate of 30 fps. Movies are recorded in MOV format using H.264 compression, ensuring high-quality footage with efficient file sizes. The camera also supports monaural audio recording and features a built-in microphone for capturing sound. Users can manually adjust settings like exposure compensation for better control. Additionally, the Rebel T3 offers in-camera editing options, such as trimming clips and extracting still images from video frames, enhancing creativity and convenience for filmmakers and photographers alike.

First-Time Setup and Configuration
Unpack and inspect the camera, charge the battery, insert the memory card, attach the lens and strap, and set the date, time, and language properly.
Unpacking and Initial Inspection
Begin by carefully unboxing the Canon Rebel T3 and inspecting for any visible damage. Verify all included accessories, such as the battery, charger, and lens. Ensure the camera body is free from scratches or defects. Check the lens for smudges or damage and inspect the viewfinder and LCD screen for clarity. Familiarize yourself with the camera’s exterior controls and ports. Refer to the packing list to confirm all items are included. This step ensures your equipment is in perfect condition before use.
Charging the Battery and Inserting the Memory Card
Charge the Canon Rebel T3 battery using the provided charger until the indicator turns green. Insert the battery into the camera’s battery compartment, ensuring it clicks securely. Next, open the memory card slot on the side of the camera. Insert a compatible SD, SDHC, or SDXC card with the contacts facing the lens. Gently push until it clicks. Format the card in the camera for optimal performance. Always use a recommended memory card for reliability.
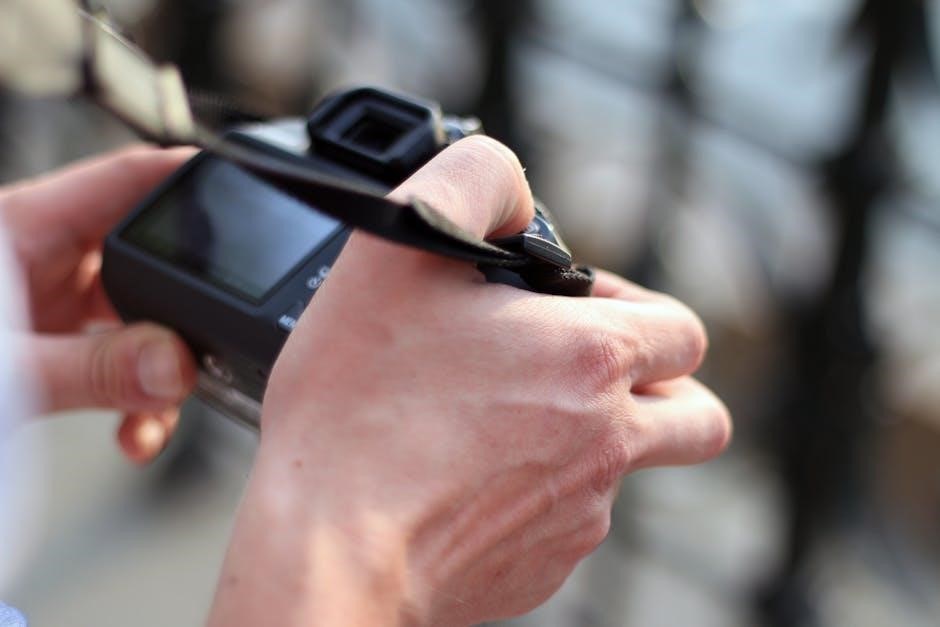
Attaching the Lens and Strap
To attach the lens, align the EF-S mount on the lens with the camera’s mount. Gently twist clockwise until it clicks. Ensure the lens is securely locked; For the strap, thread the ends through the strap eyelets on both sides of the camera. Pull firmly to ensure a snug fit. This ensures the camera is secure and easy to carry. Use only Canon-approved straps for compatibility and safety.
Setting the Date, Time, and Language
Turn on the camera and press the Menu button. Navigate to the Setup Menu (wrench icon). Select Date/Time and press SET. Use the arrow keys to adjust the date, time, and language. Highlight OK and press SET to save. Ensure the date and time are accurate for proper file naming and sorting. This step is essential for organizing your photos and ensuring correct timestamping. Use simple navigation for quick setup.
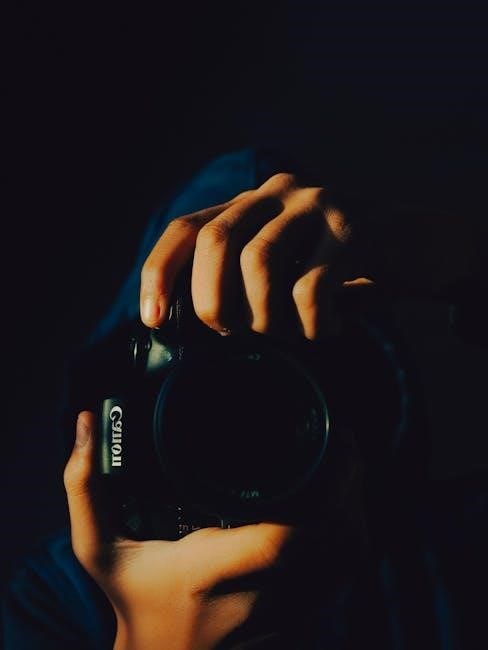
Basic Camera Operations
Mastering basic operations ensures smooth photography. Familiarize yourself with the camera layout, learn fundamental shooting techniques, and understand how to use the viewfinder and LCD effectively. The mode dial is key to selecting shooting modes, while buttons like shutter release and aperture control enable precise adjustments. Practice these basics to enhance your photography experience and capture high-quality images consistently.
Understanding the Mode Dial
The mode dial on the Canon Rebel T3 allows you to select different shooting modes. Auto mode simplifies photography by adjusting settings automatically. P (Program) mode offers flexibility while maintaining ease of use. Tv (Shutter Priority) and Av (Aperture Priority) enable manual control over shutter speed or aperture. M (Manual) mode provides full control for advanced users. Additional modes like Portrait, Landscape, Close-up, Sports, and Night Portrait optimize settings for specific scenarios. Experiment with these modes to explore creative possibilities and improve your photography skills. Always refer to the manual for detailed guidance on each mode’s functionality and customization options.
Using the Viewfinder and LCD Screen
The Canon Rebel T3 features a built-in viewfinder and an LCD screen for composing and reviewing shots. The viewfinder provides a clear, real-time preview of your scene, ideal for precise framing. The 3-inch LCD screen allows you to review images, access menus, and adjust settings. Use the Display button to toggle between the viewfinder and LCD. For brightness adjustments, use the Quick Control Dial. The LCD also displays shooting information and histograms for better exposure control. Always clean the LCD with a soft cloth to maintain clarity and protect it from scratches.
Basic Shooting Techniques
Mastering basic shooting techniques with the Canon Rebel T3 ensures sharp, well-composed images. Always hold the camera steady, with one hand gripping the body and the other supporting the lens. Use the autofocus to lock onto your subject for precise focus. Experiment with composition by placing subjects off-center and using leading lines. Pay attention to lighting, avoiding harsh midday sun for softer results. Shoot in RAW format for better post-processing flexibility. Practice these techniques to enhance your photography skills and capture stunning moments with ease.
Reviewing Images on the LCD
The Canon Rebel T3 features a 2.7-inch LCD screen for reviewing images. Use the Playback button to view captured photos. Zoom in on details using the Zoom button to check focus and sharpness. Scroll through images with the Left and Right buttons. Access the Playback Menu to delete, protect, or rotate images. Use the histogram display to assess exposure balance. This feature helps photographers review and refine their shots instantly, ensuring better results in subsequent captures.
Navigating the Menu System
The Canon Rebel T3’s menu system allows users to adjust settings efficiently. Use the cross keys to navigate and select options. Press the Q button for quick access to common settings. Menu tabs are organized by category, such as Shooting, Playback, and Setup, making it easy to locate specific functions. This streamlined interface ensures intuitive control over camera operations;
Accessing and Navigating the Menu
Access the Canon Rebel T3’s menu by pressing the Menu button. Use the cross keys to scroll through options and the Set button to select. The menu is divided into tabs for Shooting, Playback, and Setup. Highlight a tab with the cross keys and press Set to view its options. Navigate within submenus using the up and down keys. Press the Menu button again to exit. This system allows easy access to customize camera settings for optimal performance.
Customizing Camera Settings
Customizing the Canon Rebel T3’s settings allows you to tailor its performance to your needs. Use the menu system to adjust options like autofocus, metering modes, and ISO settings. Select the desired option with the cross keys and confirm with the Set button. You can also enable features like auto-rotation and image stabilization. Experiment with settings to enhance your shooting experience and achieve the desired results. Remember to save your preferences to ensure they remain active after turning off the camera.
Saving and Resetting Settings
To save your customized settings on the Canon Rebel T3, navigate to the Menu and select the appropriate option. Use the cross keys to highlight and confirm with the Set button. If you wish to reset settings to their default values, access the Setup Menu and choose the reset option. This feature is useful for troubleshooting or starting fresh. Always save your settings before resetting to avoid losing custom configurations.
Advanced Shooting Modes
The Canon Rebel T3 offers Manual, Aperture Priority, Shutter Priority, and Program modes, allowing photographers to control exposure settings creatively and achieve desired results effortlessly.
Manual (M) Mode
Manual mode grants full control over aperture, shutter speed, and ISO, allowing photographers to customize settings for precise results. Use the mode dial to select M, then adjust aperture with the lens ring and shutter speed via the main dial. The LCD screen displays settings and offers a preview of exposure. For optimal results, test different combinations and adjust as needed. This mode is ideal for experienced users seeking creative control over their shots.
Aperture Priority (Av) Mode
Aperture Priority mode allows you to set the aperture while the camera automatically adjusts the shutter speed for proper exposure. Select Av on the mode dial, then adjust the aperture using the lens ring. This mode is ideal for controlling depth of field, such as blurring backgrounds in portraits or keeping landscapes sharp. The camera ensures optimal exposure by adjusting shutter speed, while you maintain creative control over aperture. Use this mode for versatility in various lighting conditions and subjects.
Shutter Priority (Tv) Mode
In Shutter Priority mode, you set the shutter speed, and the camera automatically adjusts the aperture for optimal exposure. This mode is perfect for capturing motion, such as freezing fast-moving subjects or creating motion blur. Select Tv on the mode dial and adjust the shutter speed using the control dial. The camera will adjust the aperture to ensure proper exposure, giving you control over the timing of your shots while maintaining image quality. This mode is ideal for action photography and artistic effects.
Program (P) Mode
Program (P) mode is a semi-automatic mode where the camera automatically sets both aperture and shutter speed for a balanced exposure. This mode is ideal for everyday shooting, offering ease of use while allowing adjustments to settings like ISO, white balance, and others. It’s a versatile option for photographers who want reliable results without manual control. P mode is a great learning tool, helping users understand how exposure settings work together. It’s suitable for various conditions and serves as a stepping stone to more advanced modes.
Custom Functions and Settings
Custom functions and settings allow users to tailor camera operations to personal preferences, enhancing shooting efficiency and creativity through personalized configurations and shortcuts.
Understanding Custom Functions
Custom functions on the Canon Rebel T3 allow users to personalize camera settings for specific shooting scenarios, enhancing control and efficiency. These functions enable adjustments to autofocus modes, metering, and button assignments, tailored to individual preferences. By modifying default settings, photographers can optimize the camera for their unique workflows, ensuring quicker access to frequently used features. Custom functions simplify complex operations, making the camera more intuitive and adaptable to various creative demands. They are a key tool for achieving consistent and professional results.
Configuring Custom Functions for Personalized Shooting
Configuring custom functions on the Canon Rebel T3 allows photographers to tailor settings to their shooting style. Access the Custom Functions menu via the camera’s menu system and adjust options like autofocus modes, metering patterns, and button assignments. For instance, you can set the shutter button to start/stop metering or customize the AF mode for faster focusing in specific scenarios. These configurations streamline workflow, ensuring quick access to preferred settings and enhancing shooting efficiency. This personalization helps photographers adapt the camera to their creative vision.

Image Quality and Storage
Optimize image quality by adjusting resolution and compression settings. Higher resolution captures more detail, while lower settings conserve memory card space for extended shooting sessions.
Setting Image Quality and Size
Adjusting image quality and size on the Canon Rebel T3 allows you to balance detail and storage. Choose from Large, Medium, or Small resolutions to suit your needs. The camera also offers JPEG compression levels, with Fine, Normal, or Basic options for varying file sizes. For higher quality, shoot in RAW format, which retains more image data. Access these settings via the menu, ensuring optimal file sizes without compromising image clarity. Properly configuring these settings helps manage memory card space efficiently while maintaining desired image quality.
Understanding White Balance Settings
White balance adjusts the color temperature of your images to match lighting conditions, ensuring natural hues. The Canon Rebel T3 offers Auto, Daylight, Shade, Tungsten, Fluorescent, and Custom settings. Auto adapts to scenes, while Daylight suits outdoor photography. Shade warms tones for shaded areas, and Tungsten corrects indoor lighting. Fluorescent addresses fluorescent light, and Custom allows manual adjustment for precise control. Proper white balance enhances image accuracy and minimizes post-processing needs, ensuring professional-looking photos in various lighting environments.
Using the Memory Card Effectively
To maximize your Canon Rebel T3’s performance, use high-quality SD or SDHC memory cards. Always format the card in the camera to ensure compatibility and optimal performance. Organize files by date or event using the camera’s folder creation feature. Choose the right card capacity based on your shooting needs, especially for HD video recording. Regularly check card health and avoid overfilling to prevent slow performance. Use a card reader for efficient file transfers to your computer.

Playback and Editing
Efficiently review and enhance your photos using the Canon Rebel T3’s LCD screen, which offers basic editing tools like cropping and resizing for quick adjustments.
Reviewing and Deleting Images
Use the Canon Rebel T3’s 2.7-inch LCD screen to review captured images. Press the Playback button to enter playback mode. Navigate through images using the Arrow Keys or Quick Control Dial; To delete a single image, press the Trash Can button and confirm with the SET button. For multiple deletions, select images in playback mode and choose Delete from the menu. Be cautious with card formatting, as it permanently deletes all images.
Basic In-Camera Editing Features
The Canon Rebel T3 offers basic in-camera editing tools, allowing you to enhance images without a computer. Use the Retouch Menu to adjust brightness, contrast, and color balance. The camera also features Auto Lighting Optimizer to improve image clarity. You can resize images for sharing and apply creative filters like Grainy B/W or Toy Camera Effect. These features are accessible via the menu system, enabling quick edits before transferring photos to a computer for further processing.
Accessories and Additional Equipment
Explore compatible accessories like lenses, flashes, and tripods to enhance your Canon Rebel T3 experience. These tools expand functionality and creativity, ensuring versatile photography.
Compatible Lenses for the Canon Rebel T3
The Canon Rebel T3 is compatible with EF-S lenses, designed for APS-C sensors. Popular options include the EF-S 18-55mm kit lens, EF-S 55-250mm telephoto zoom, and prime lenses like the EF 50mm f/1.8; These lenses offer versatility for various photography styles, from portraits to landscapes. When selecting lenses, ensure compatibility with the EF-S mount to maintain optimal performance and avoid potential issues. Experimenting with different focal lengths can enhance creativity and image quality in your photography journey.
Using External Flash Units
The Canon Rebel T3 supports external flash units for enhanced lighting control. Compatible Speedlite flash units, like the Speedlite 430EX II, can be mounted on the camera’s hot shoe. Enable the external flash via the menu system for precise lighting. Adjust flash settings to achieve desired results, such as reducing shadows or adding depth. Experiment with bounce flash techniques for softer, more natural illumination. Always ensure the flash is properly aligned with the camera’s E-TTL II system for optimal performance. Check battery levels before use for uninterrupted shooting sessions.
Utilizing a Tripod for Stability
A tripod is essential for ensuring camera stability, especially in low-light conditions or when using slower shutter speeds. Attach the tripod to the camera’s tripod mount for secure support. This reduces camera shake and blur, resulting in sharper images. Ideal for landscape or night photography, a tripod allows precise control over composition. Choose a sturdy tripod that supports the camera’s weight. Use the self-timer or remote shutter release for added stability during shots. This setup enhances image quality and expands creative possibilities.
Troubleshooting Common Issues
Identify and resolve issues like camera malfunctions or error messages. Reset settings to default, clean the sensor, and ensure proper memory card usage for optimal performance.
Resolving Error Messages
Understand and address error messages like “Err 01” or “Err 02,” which often indicate issues with the memory card or camera hardware. Always turn the camera off before removing or replacing the memory card. Clean the memory card contacts gently with a soft cloth. If errors persist, format the memory card in the camera or update the firmware. Ensure all connections, such as the lens and memory card, are secure. Resetting the camera to default settings can also resolve recurring issues.
Camera Maintenance Tips
Regularly clean the camera body and lens with a soft, dry cloth to prevent dust buildup. Use a microfiber cloth to gently wipe the LCD screen and viewfinder. Store the camera in a protective case to avoid scratches. Avoid exposing the camera to extreme temperatures or humidity. Clean the memory card slots with compressed air. Handle the camera with care to prevent accidental drops. Avoid touching the image sensor to maintain image quality. Regular maintenance ensures optimal performance and longevity of your Canon Rebel T3.
Mastering the Canon Rebel T3 requires practice and exploration. This manual has guided you through its features and functions. For further learning, explore Canon’s official resources, online tutorials, and photography communities to enhance your skills. Happy shooting!
Final Tips for Mastering the Canon Rebel T3
To fully master the Canon Rebel T3, experiment with different shooting modes and settings to understand their effects. Practice regularly to develop muscle memory and improve your technique. Review your photos to identify areas for improvement and adjust your approach accordingly. Explore creative techniques like composition and lighting to enhance your imagery. Stay updated with photography trends and tips to continuously refine your skills. Keep experimenting and enjoy the journey of capturing stunning moments with your Canon Rebel T3.
Recommended Resources for Further Learning
For deeper understanding, explore Canon’s official website for tutorials and guides. Online forums and photography communities offer valuable insights and troubleshooting tips. Consider enrolling in photography workshops or online courses to enhance your skills. Additionally, books on DSLR photography provide comprehensive knowledge. Utilize YouTube channels dedicated to Canon cameras for visual learning. Lastly, subscribe to photography blogs for the latest trends and techniques to keep improving with your Canon Rebel T3.